No products in the cart.
News
How to Clean Earwax from Headphones
Earwax buildup is a common problem for headphone users, especially those who use in-ear earbuds. Earwax can not only affect the sound quality of your headphones but also create a breeding ground for bacteria. This guide provides practical tips and techniques on how to safely and effectively remove earwax from your headphones, ensuring optimal hygiene and audio performance.

Why Clean Earwax from Your Headphones?
- Hygiene: Earwax can harbor bacteria and other microorganisms that can lead to ear infections or other health issues. Regular cleaning helps maintain hygiene and prevent infections.
- Sound Quality: Earwax buildup can block sound waves, muffling the audio and affecting the overall sound quality of your headphones. Cleaning ensures optimal audio performance.
- Longevity: Earwax can damage headphone components over time, especially the delicate drivers in earbuds. Regular cleaning can help extend the lifespan of your headphones.
Tools and Materials
- Cotton swabs
- Isopropyl alcohol
- Soft, dry cloth
- Toothbrush (optional)
- Blu-tack or adhesive putty (optional)
Cleaning In-Ear Earbuds
- Remove the ear tips: Gently pull the ear tips off the earbuds. Some ear tips may require a twisting motion to detach.
- Clean the ear tips: Wash the ear tips with warm water and mild soap. You can also use a cotton swab dipped in isopropyl alcohol to disinfect them. Allow the ear tips to dry completely before reattaching.
- Clean the earbuds: Use a dry cotton swab to gently remove any visible earwax from the earbuds. If the earwax is stubborn, dampen the cotton swab with a small amount of isopropyl alcohol. Avoid getting any liquid inside the earbuds.
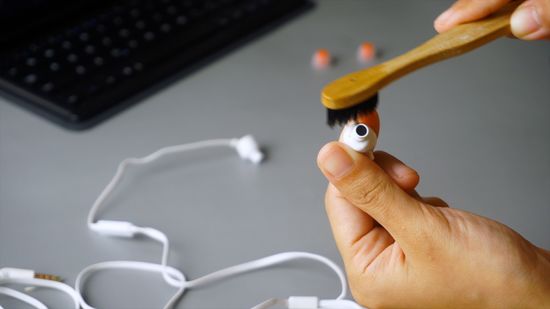
- Clean the nozzle: Use a toothpick or a small brush to carefully remove any earwax buildup from the nozzle of the earbuds. Be gentle to avoid damaging the delicate components.
- (Optional) Use Blu-tack or adhesive putty: For stubborn earwax, gently press a small piece of Blu-tack or adhesive putty onto the earbud nozzle to remove any remaining debris.
- Reattach the ear tips: Once the earbuds and ear tips are clean and dry, gently reattach the ear tips.
Cleaning Over-Ear Headphones
- Remove the earcups (if detachable): If your headphones have detachable earcups, remove them according to the manufacturer’s instructions.
- Clean the earcups: Wipe the earcups with a soft, damp cloth. Use a mild cleaning solution if necessary. Avoid getting moisture inside the earcups.
- Clean the headband: Wipe the headband with a damp cloth and mild cleaning solution. Pay attention to areas that come into contact with your skin.
Important Safety Tips
- Avoid using excessive force or sharp objects: Be gentle when cleaning your headphones to avoid damaging the delicate components.
- Don’t use liquids directly on the earbuds: Avoid getting any liquid inside the earbuds, as this can damage the drivers or other internal components.
- Allow the headphones to dry completely: Ensure all parts are completely dry before reassembling or using your headphones.
- Consult the user manual: Refer to your headphone’s user manual for specific cleaning instructions and recommendations.
Conclusion
Regularly cleaning earwax from your headphones is essential for maintaining hygiene, sound quality, and longevity. By following the tips and techniques in this guide, you can safely and effectively remove earwax from your headphones, ensuring a more enjoyable and hygienic listening experience.
Do you have any other tips for cleaning earwax from headphones? Share your advice in the comments below!
Related Articles
- How to Clean and Maintain Your Headphones
- Headphones and Hearing Health: Tips for Safe Listening
- How to Choose the Right Headphones
